A recent project required some QFN packaged components – not exactly easy to hand solder. Without a reflow oven at hand, I had to get a little bit creative.
While I’ve been meaning to get around to building a reflow oven (complete with a custom controller, because of course I have to make everything 500× more complicated than it needs to be) but so far, these plans haven’t materialized as much more than parts in my electronic component stash.
Thankfully, I had the idea to reflow stuff in a skillet before, and went through with the plan in the summer of 2018: despite not documenting the process whatsoever, the results seem to speak for themselves – it’s a viable strategy1:
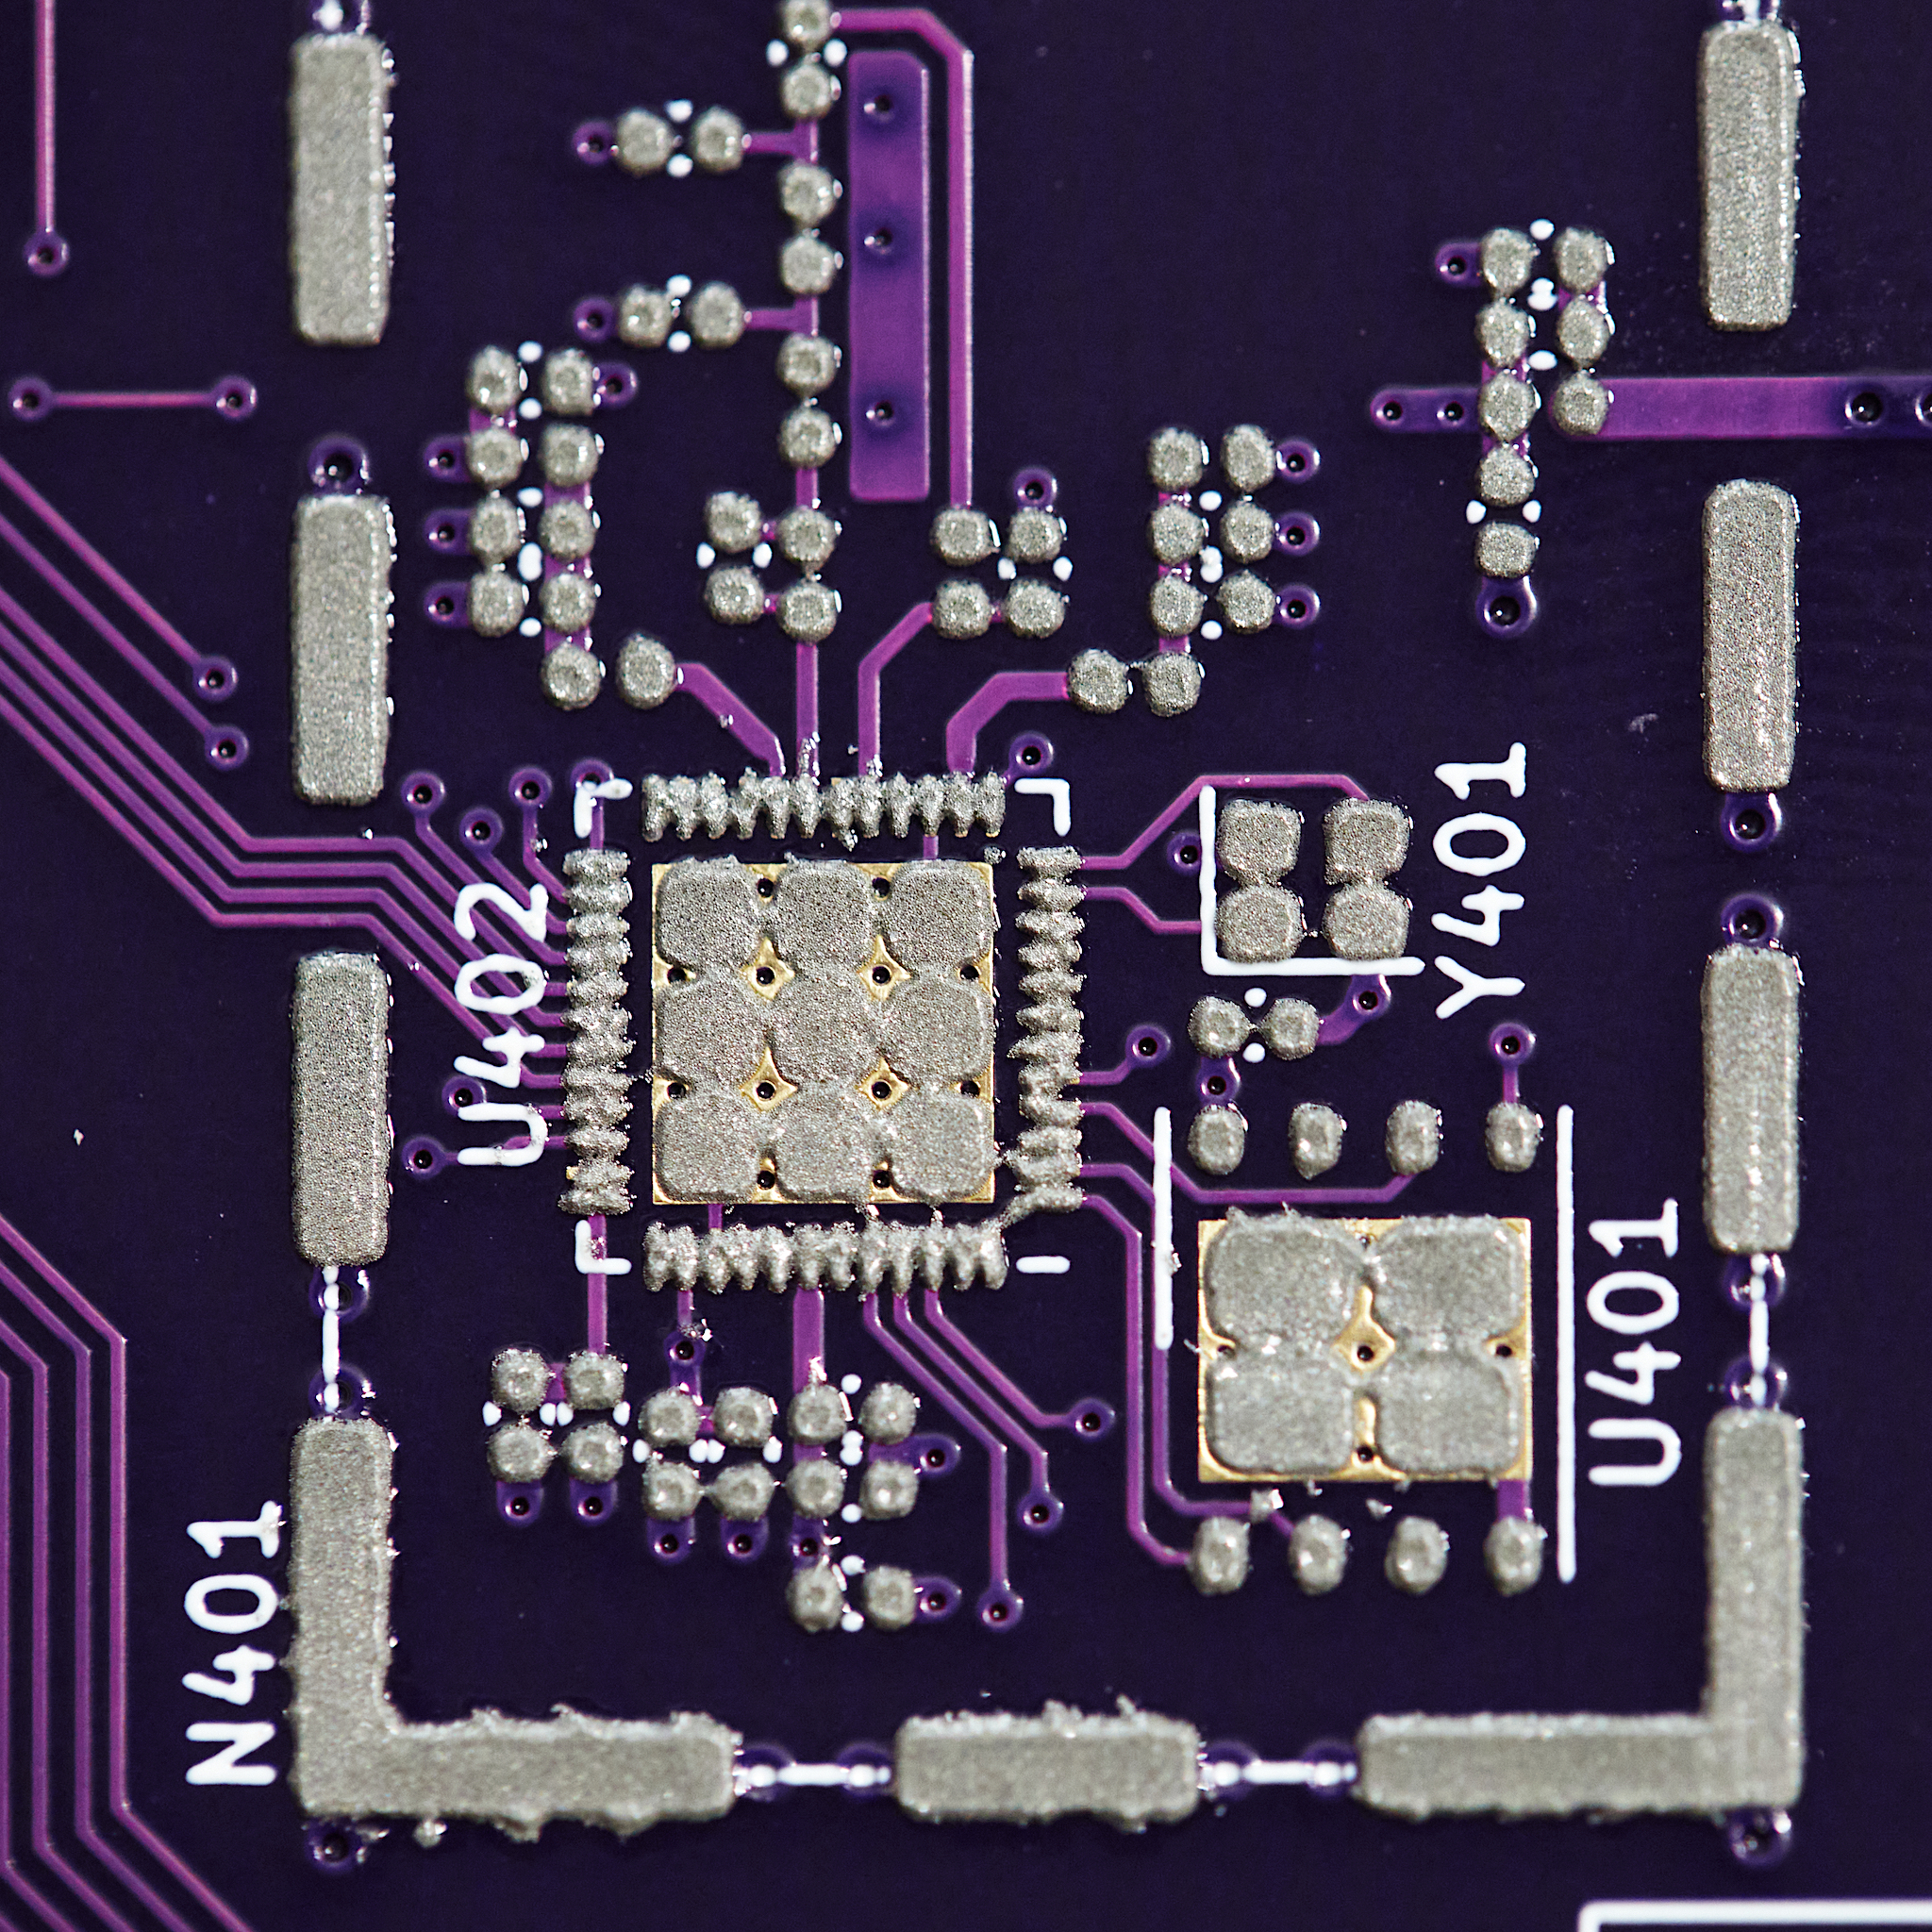
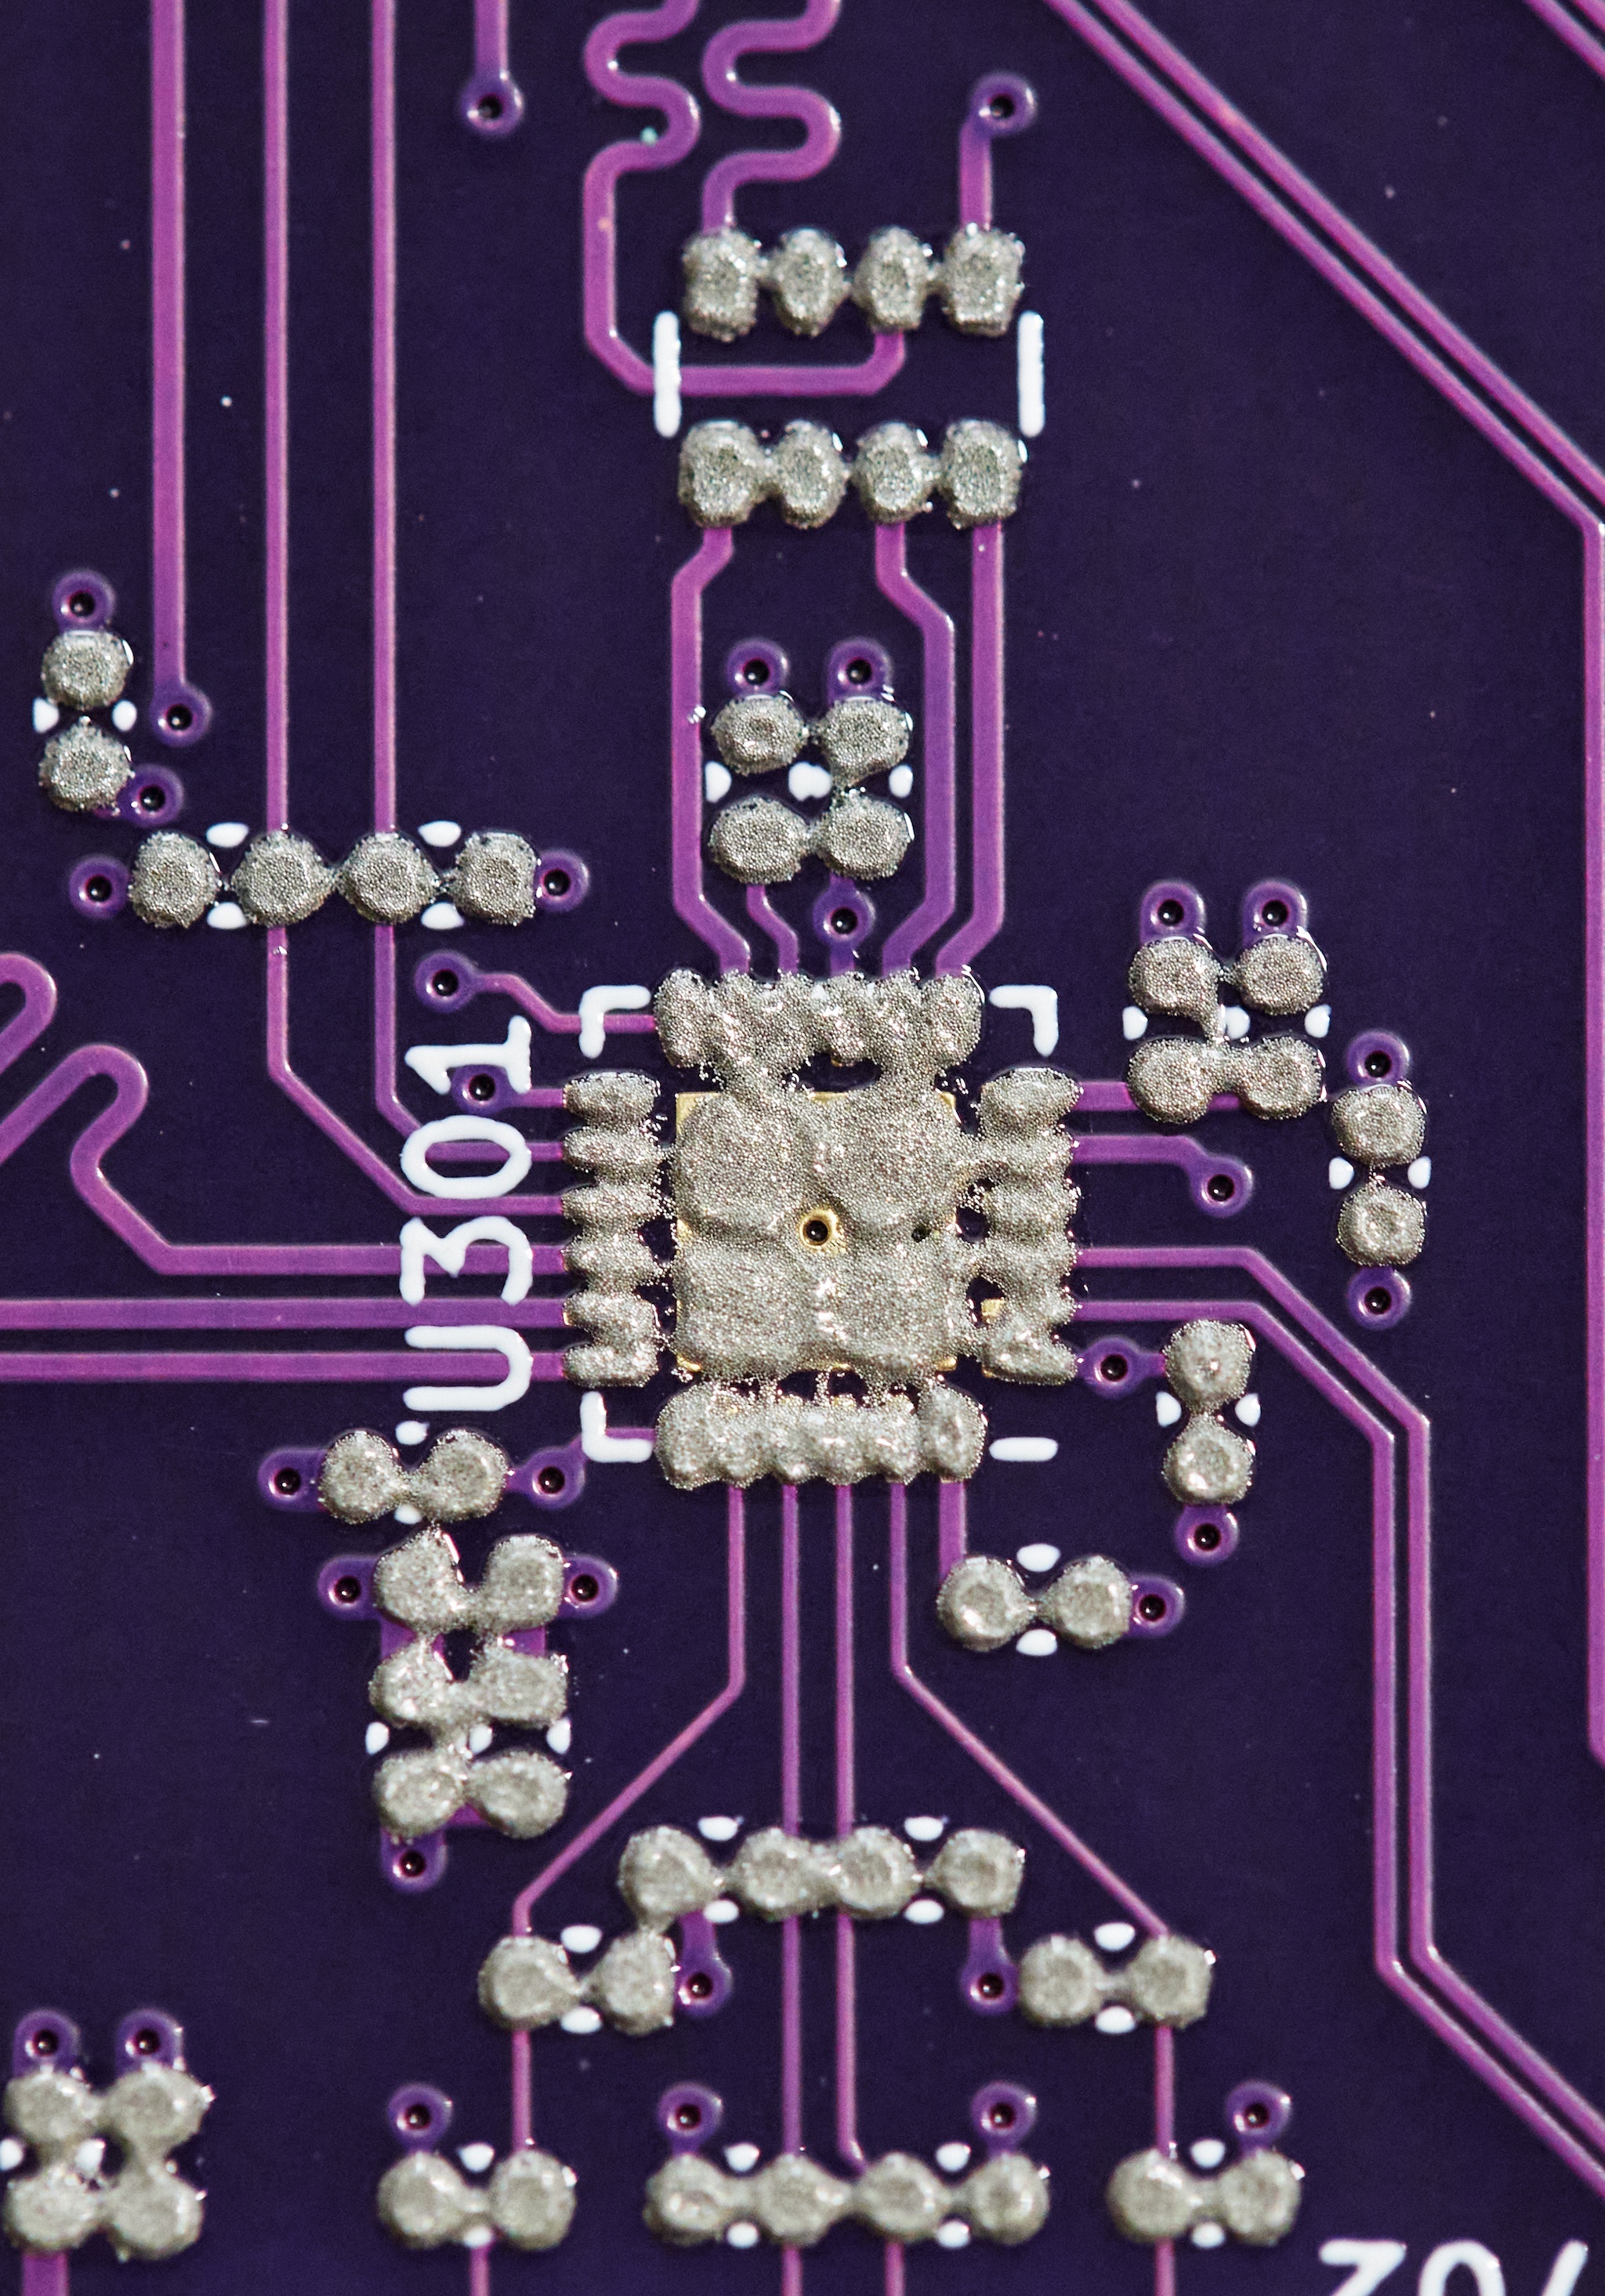
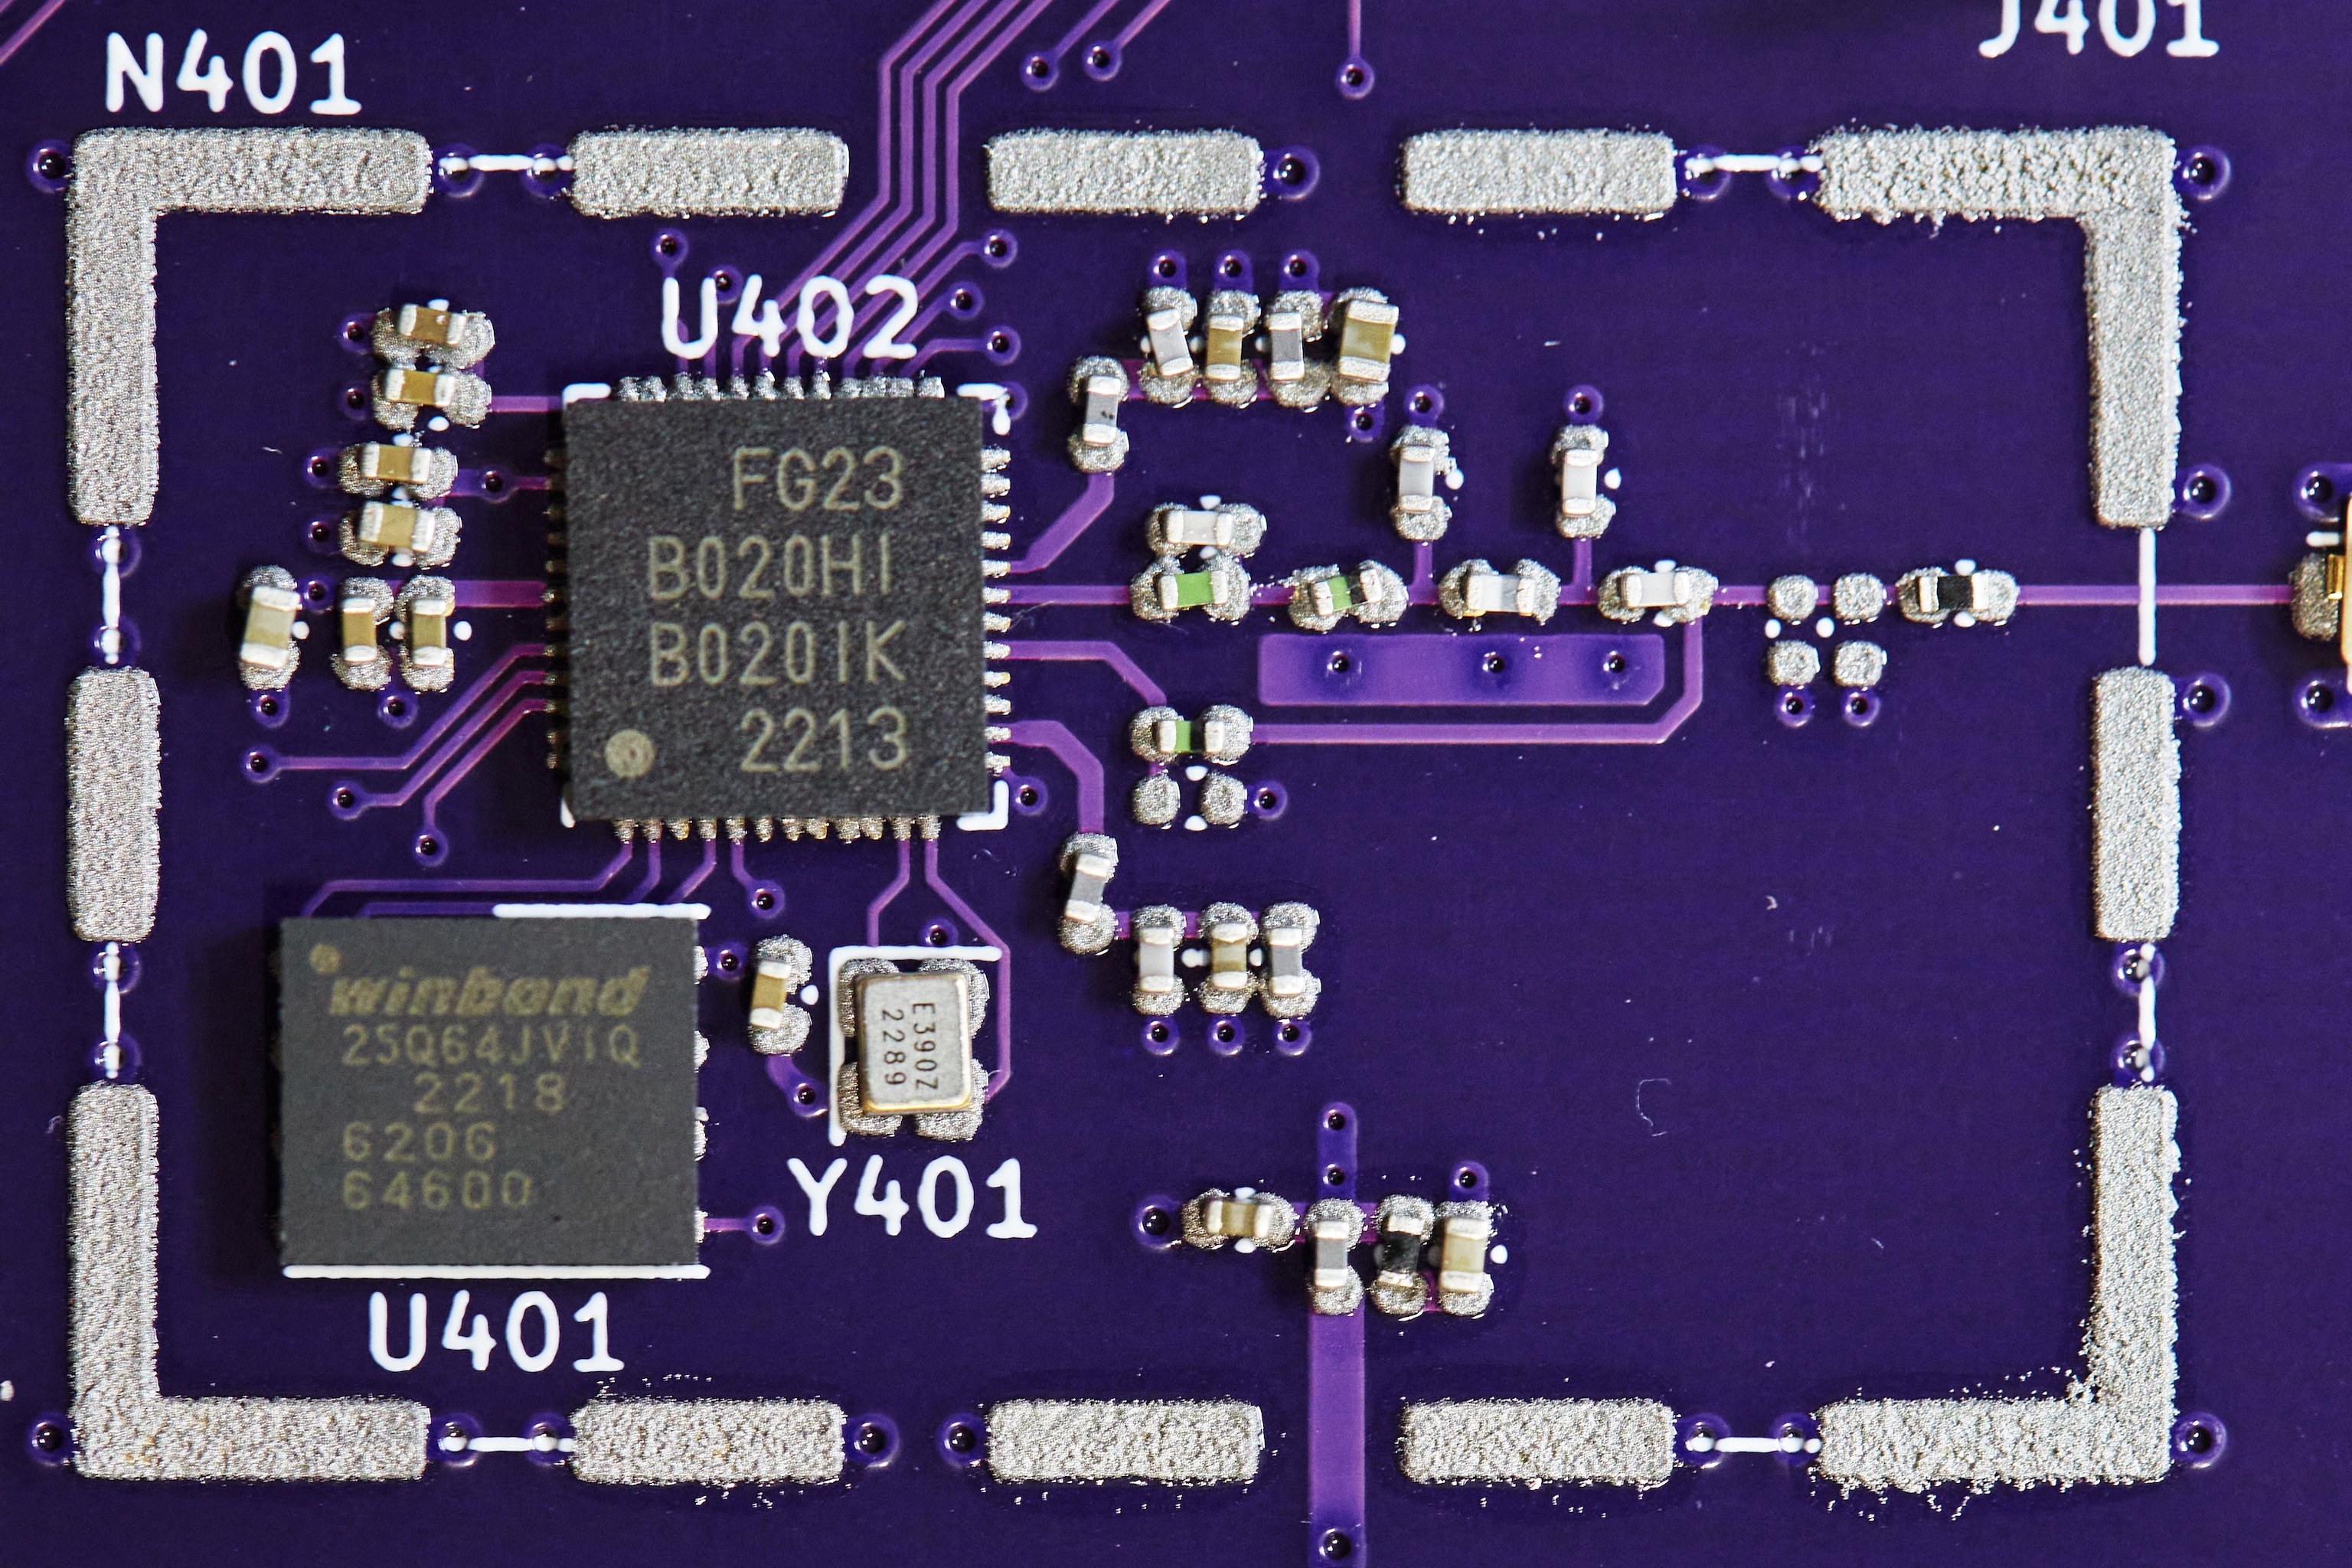
 Granted, this was after about 30 minutes of rework, but hey, looks good for being done in a skillet!
Getting Started
There’s really not a whole lot to this entire process. Get yourself an electric skillet: one you won’t share with food down the road, and ideally one that hasn’t been used before. Even if you use lead free solder paste, there’s other nasty stuff in PCBs that you definitely don’t want to ingest. (Or maybe you do, but don’t sue me.)
You’ll want to get yourself a solder stencil: this is a sheet of material that’s laser cut based on the paste (or cream) layer of your board’s gerbers. When aligned precisely over the top of the board, it’ll have holes wherever there are SMD pads. Squeeze some solder paste across the stencil and onto the board, before placing the parts on top.
There’s lots of different stencil types and ways of applying the solder paste. I’ve had great success with OSHStencils stainless steel stencils. They’ll also sell you solder paste and little acrylic jigs to hold boards in place: convenient if you don’t already have them. Shipping is usually within 2-3 days in the US, which is nice.
Part Placement
This is where you curse yourself for having 90 different BOM lines for a single board – though at least with the solder paste already down, I found that it’s much quicker to put the components down, since you can just go down the BOM and place all instances of each part.
A convenient side effect of the way solder paste works is that you don’t need to have components aligned precisely. As with normal solder, surface tension will do the work of straightening things like capacitors out, and ensuring that larger components such as ICs are lined up with their pads. It’s alright if there’s some smearing: the flux that’s imbued into the paste will take care of that, though be prepared to have small amounts of manual rework with this method.
I should also add that even though reflowing boards means you can support much finer spacings than with hand soldering, keep in mind that even though a bunch of 0402-size passives in close proximity is not an issue to solder, it’s certainly a proper pain in the ass to place. I don’t have a fancy vacuum pick and place thingie, so I had to make do with little tweezers.
I’m seriously not kidding: the 0402 passives are so stupid tiny that if you breathe too strongly in their general direction, they will go flying absolutely everywhere.
Reflowing
Now, on to the fun part: actually reflowing the board. This is where the skillet comes in: if your board isn’t already in the skillet, carefully place it in there now, being sure not to dislodge any components or smudge solder paste.
If you have a thermocouple suitable for high temperatures, go ahead and tape it to the board, so you get an idea of the current temperature of the board itself: the thermostats in the skillets are usually not particularly accurate. You probably won’t get too close to actually following reflow curves in terms of heating/cooling rates, but it’s good to try to approximate the “soak” and “reflow” stages at certain temperatures, as to avoid cooking the board.
 (He is resting)
Once you’ve got everything set, there’s not much more to do than to let ‘er rip: I found it easiest to just set the thermostat on the skillet to the highest temperature, since it’s not particularly accurate. Keep an eye on the temperature readout to make sure you’re not exceeding the maximum temperature.
Putting the top glass cover of the skillet (if it has one) on can help increase the heating rate, and trap heat in to reduce the cooling rate: keep in mind that you don’t want to cool the board too quickly, or you risk ening up with bad solder joints.
Rework
Since this is a pretty janky approach to reflowing, with not a whole lot of actual control, it’s entirely likely you’ll encounter some solder bridges.
These aren’t too bad to deal with: drown the relevant area with flux, and briefly heat it up with a hot soldering iron, and it should resolve itself. (Seriously, you can’t have enough flux.) Some stuff like system-on-modules and some connectors are best hand soldered, which you can do at this stage as well.
Conclusion
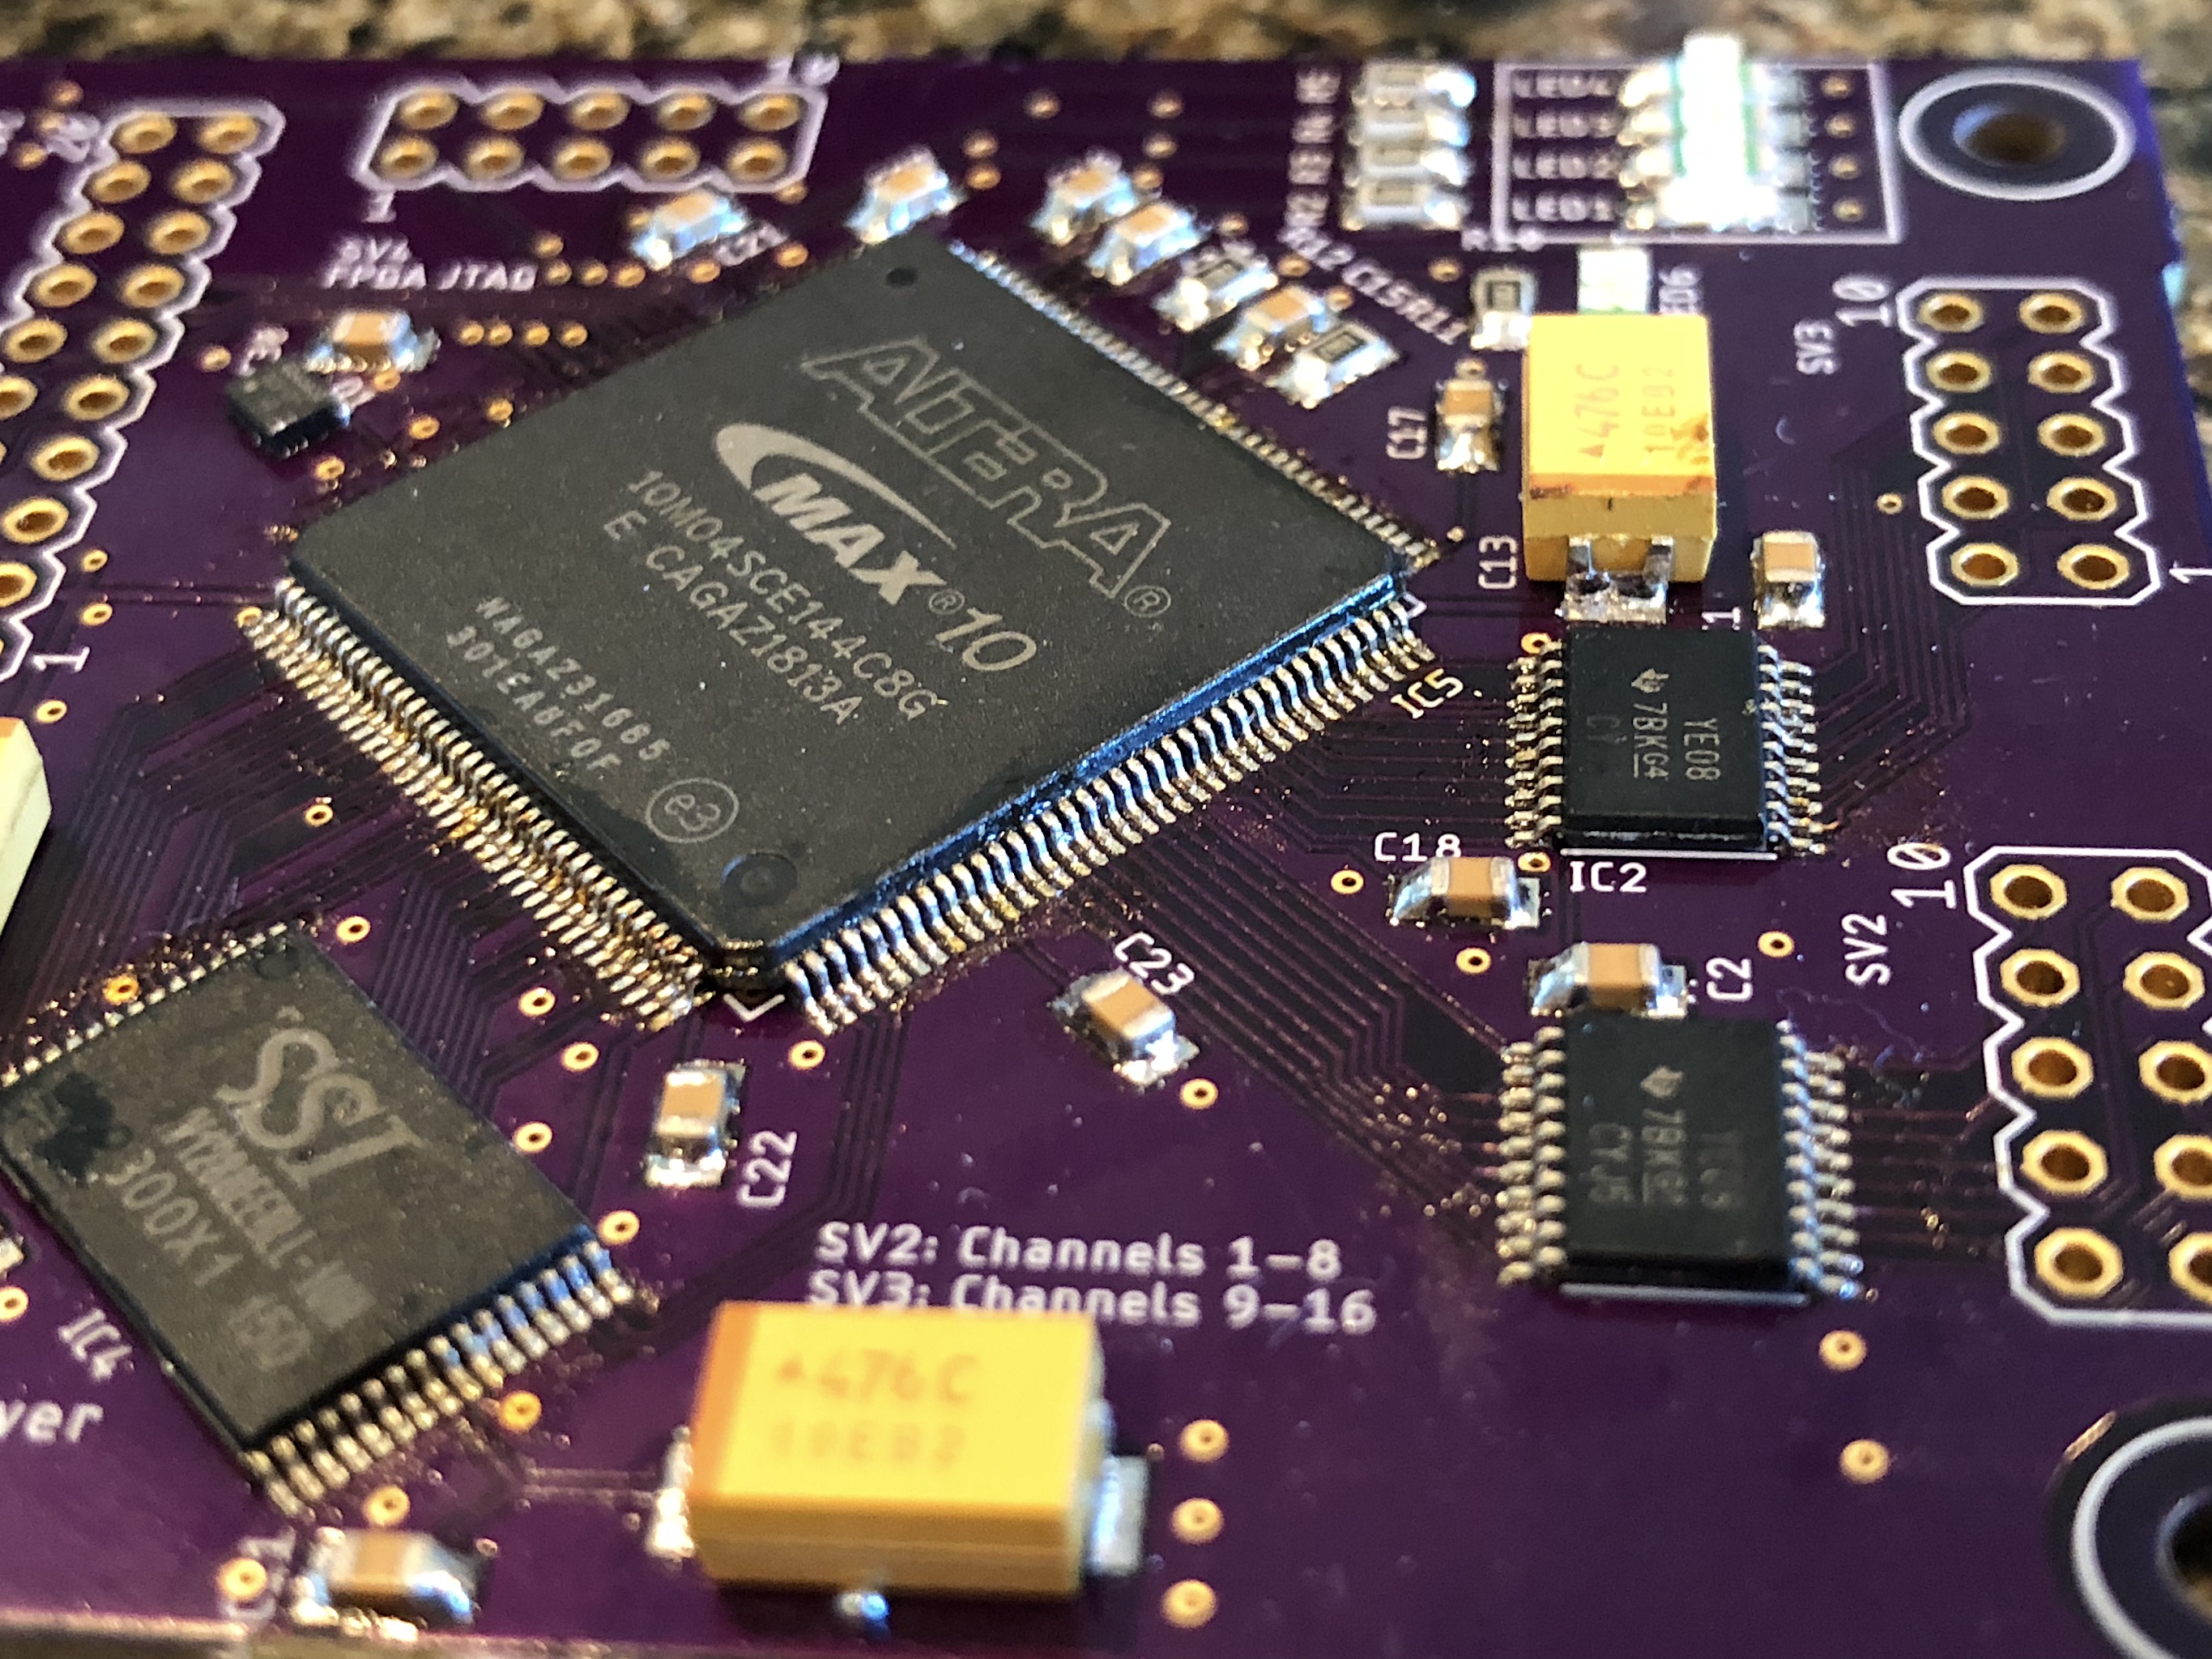
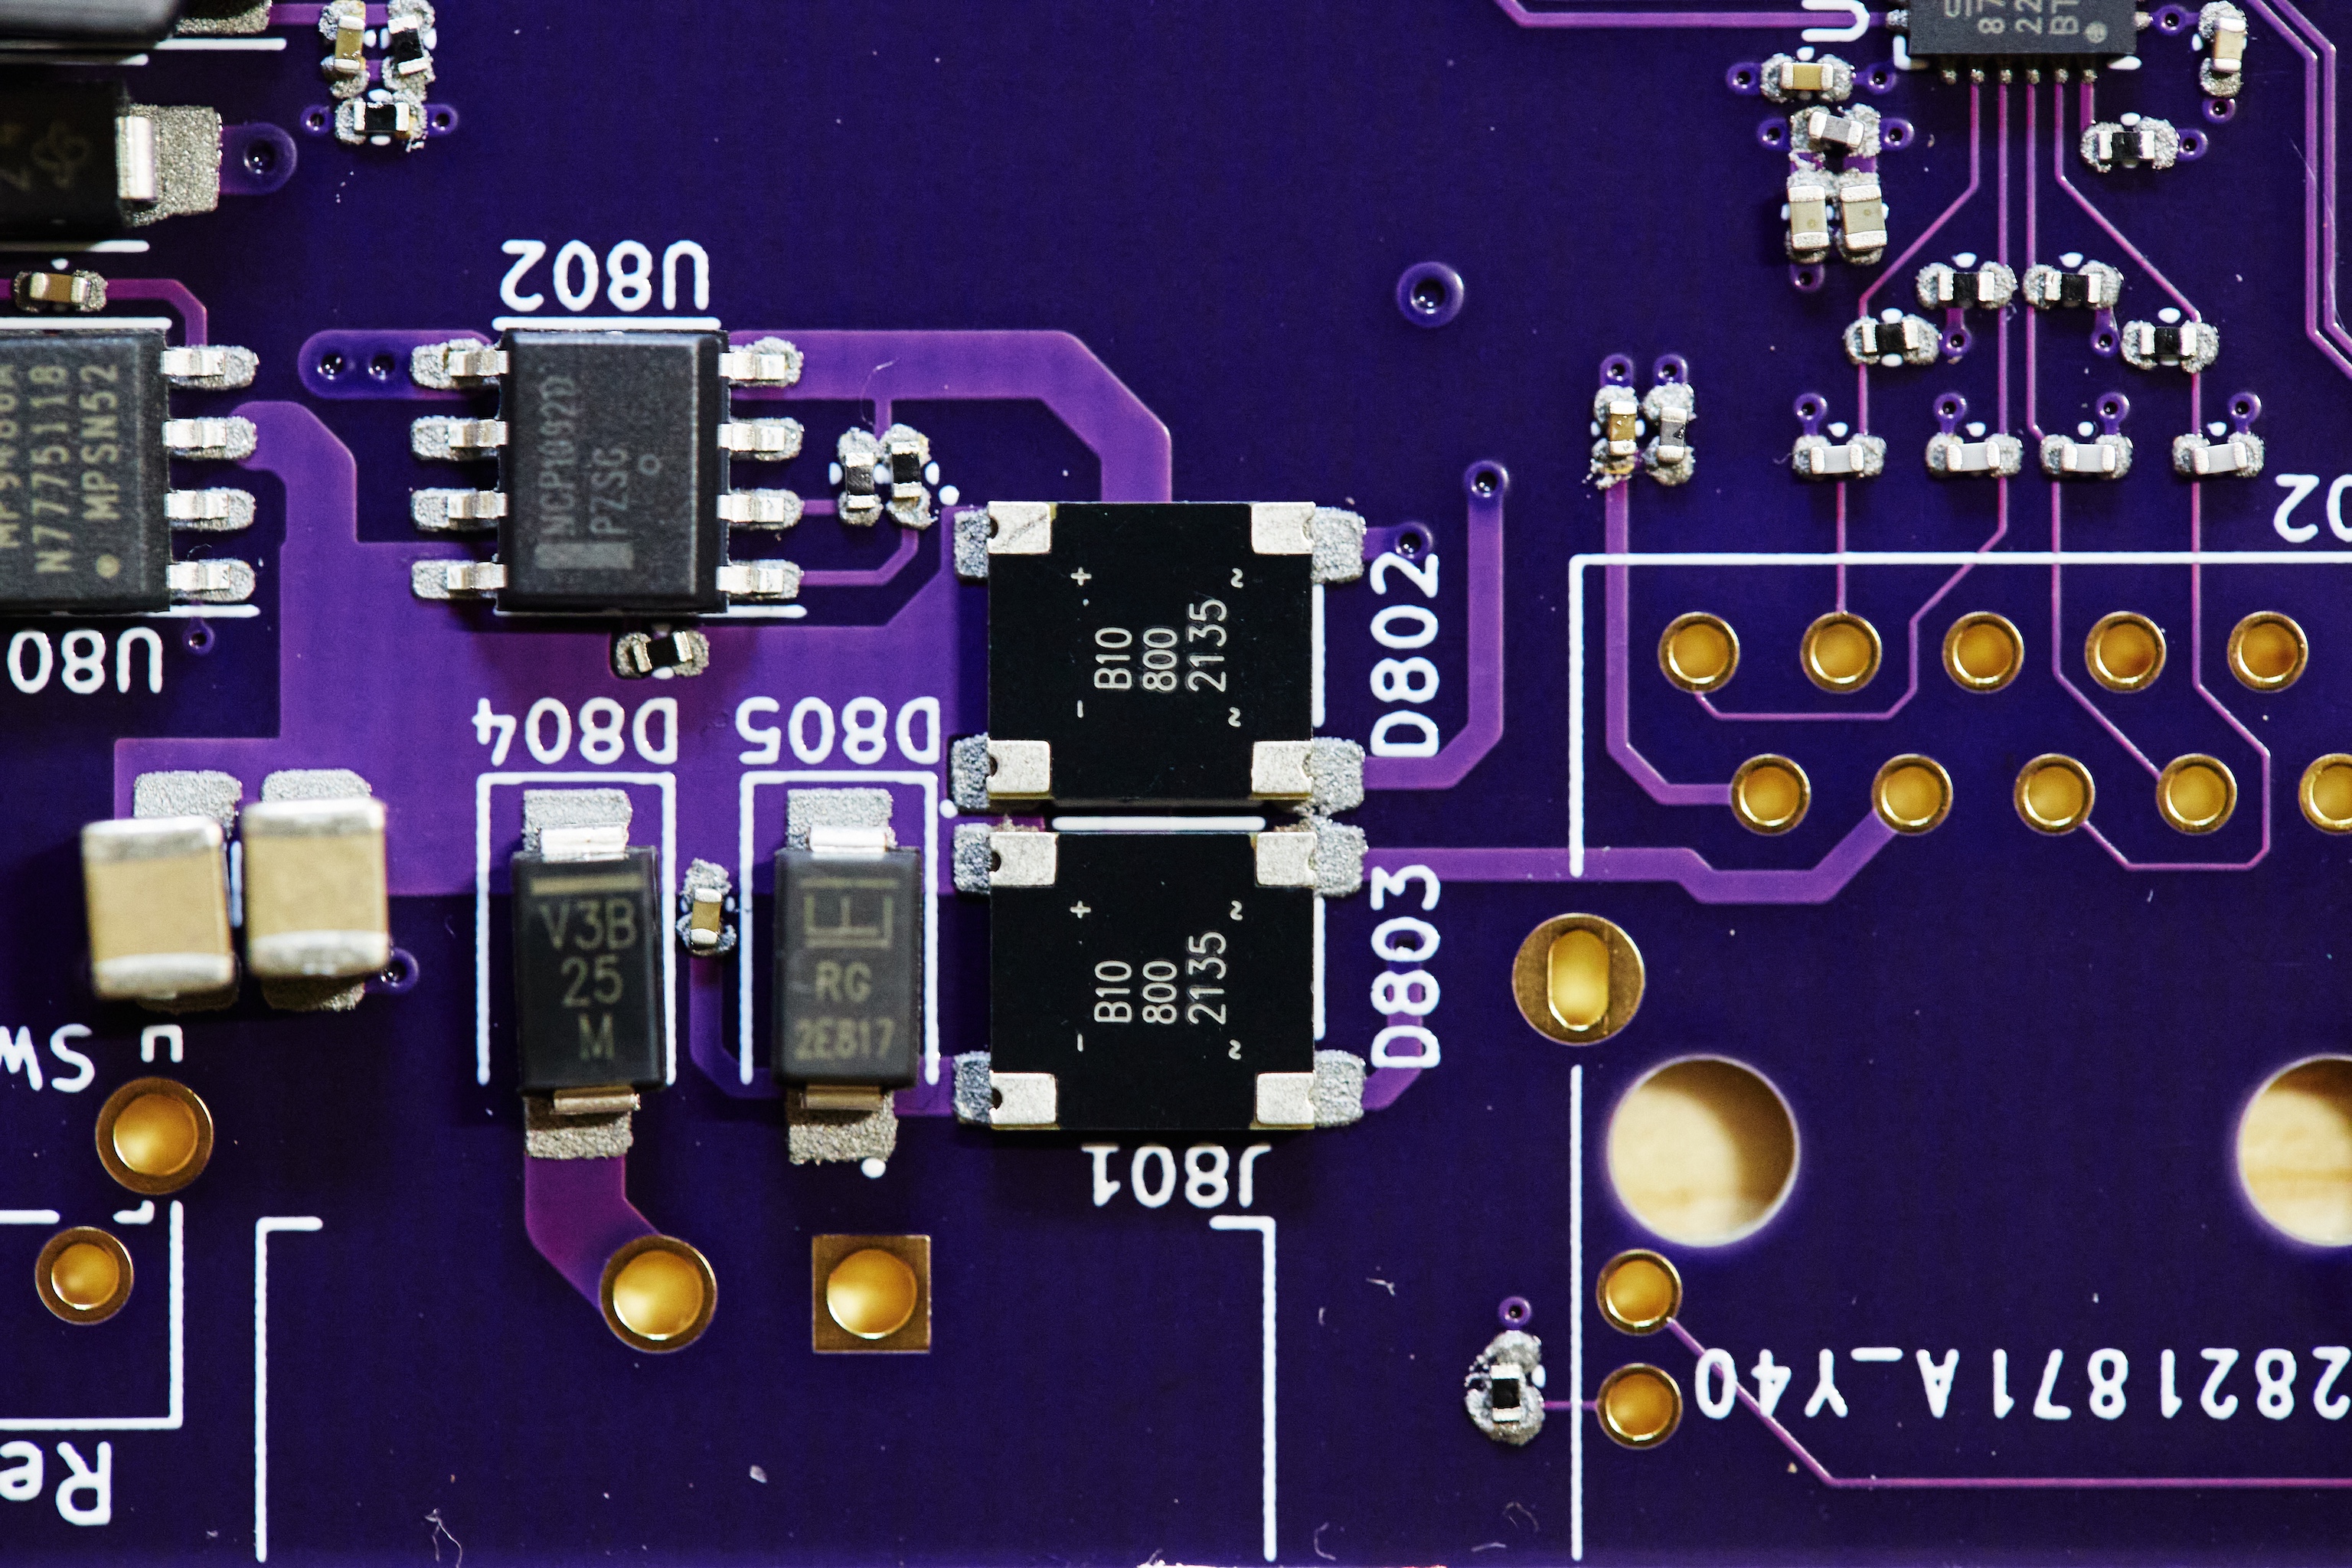
Anyways, that’s it for this time. I really just wanted to share that I’m not dead, am back on my bullshit, and have pretty pictures of electronics. Hopefully I’ll find the motivation to actually post about the ~ thing ~ I cooked!
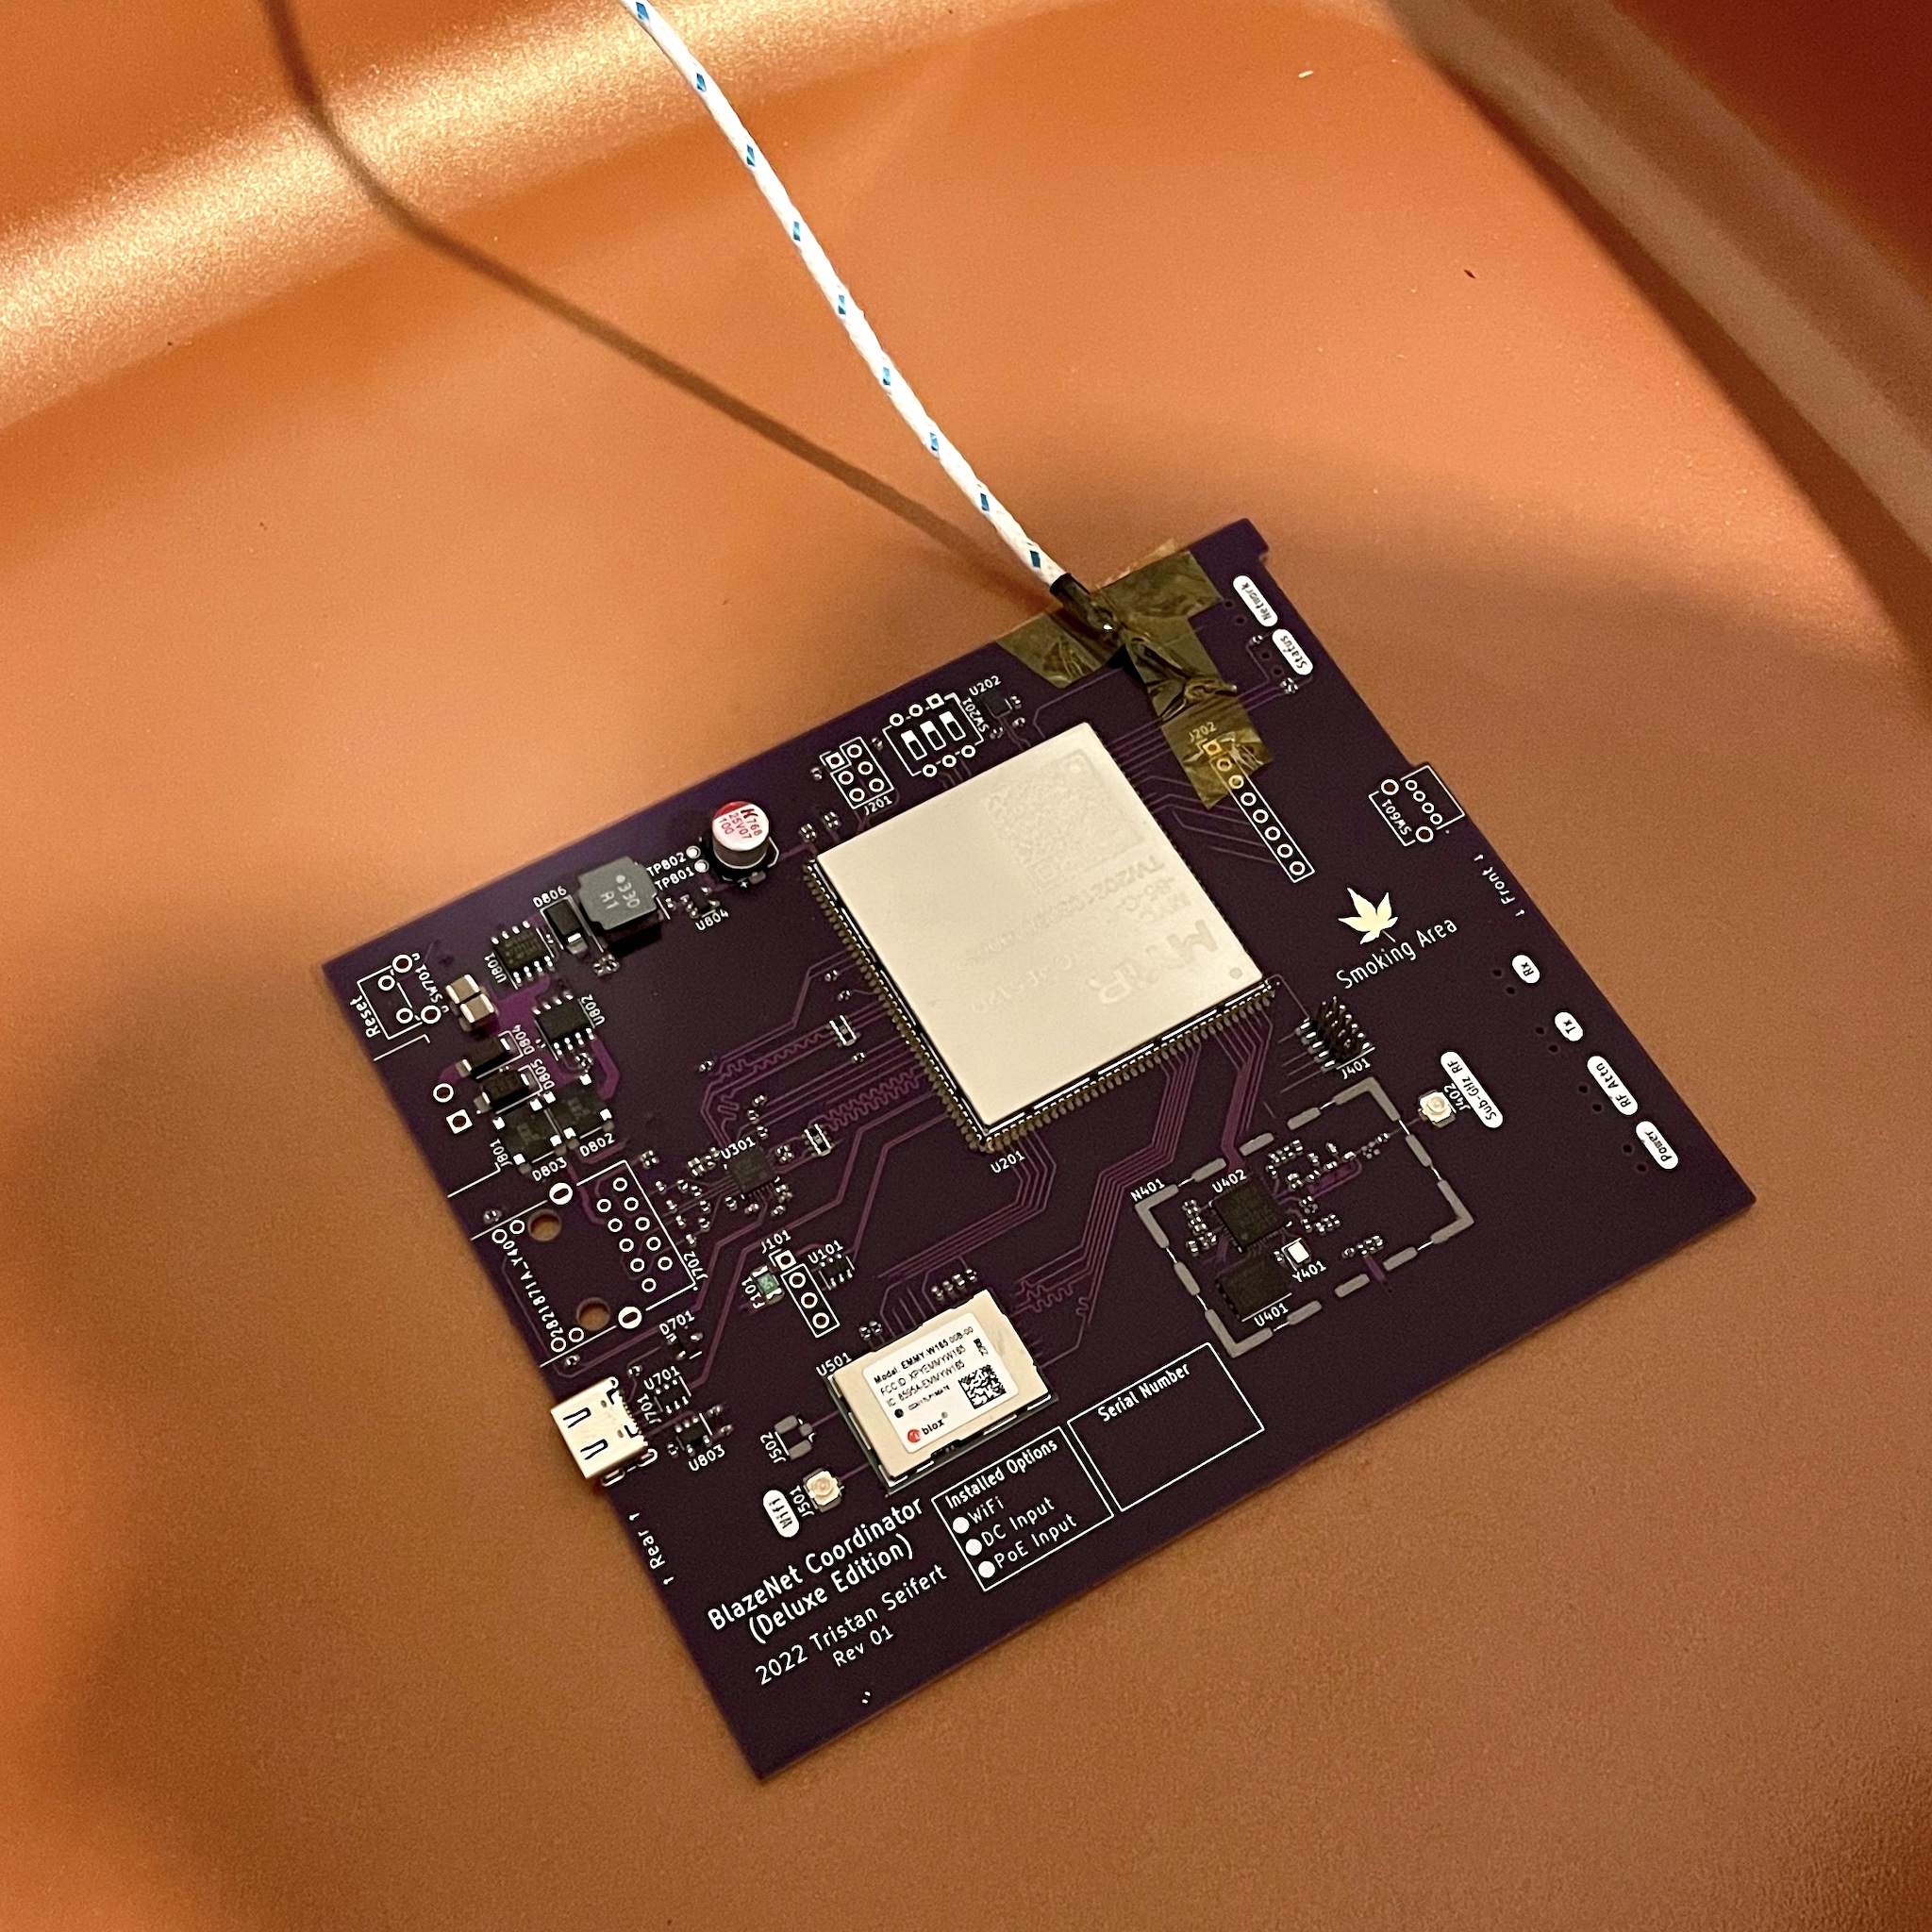
Until then, here’s a picture as a teaser:
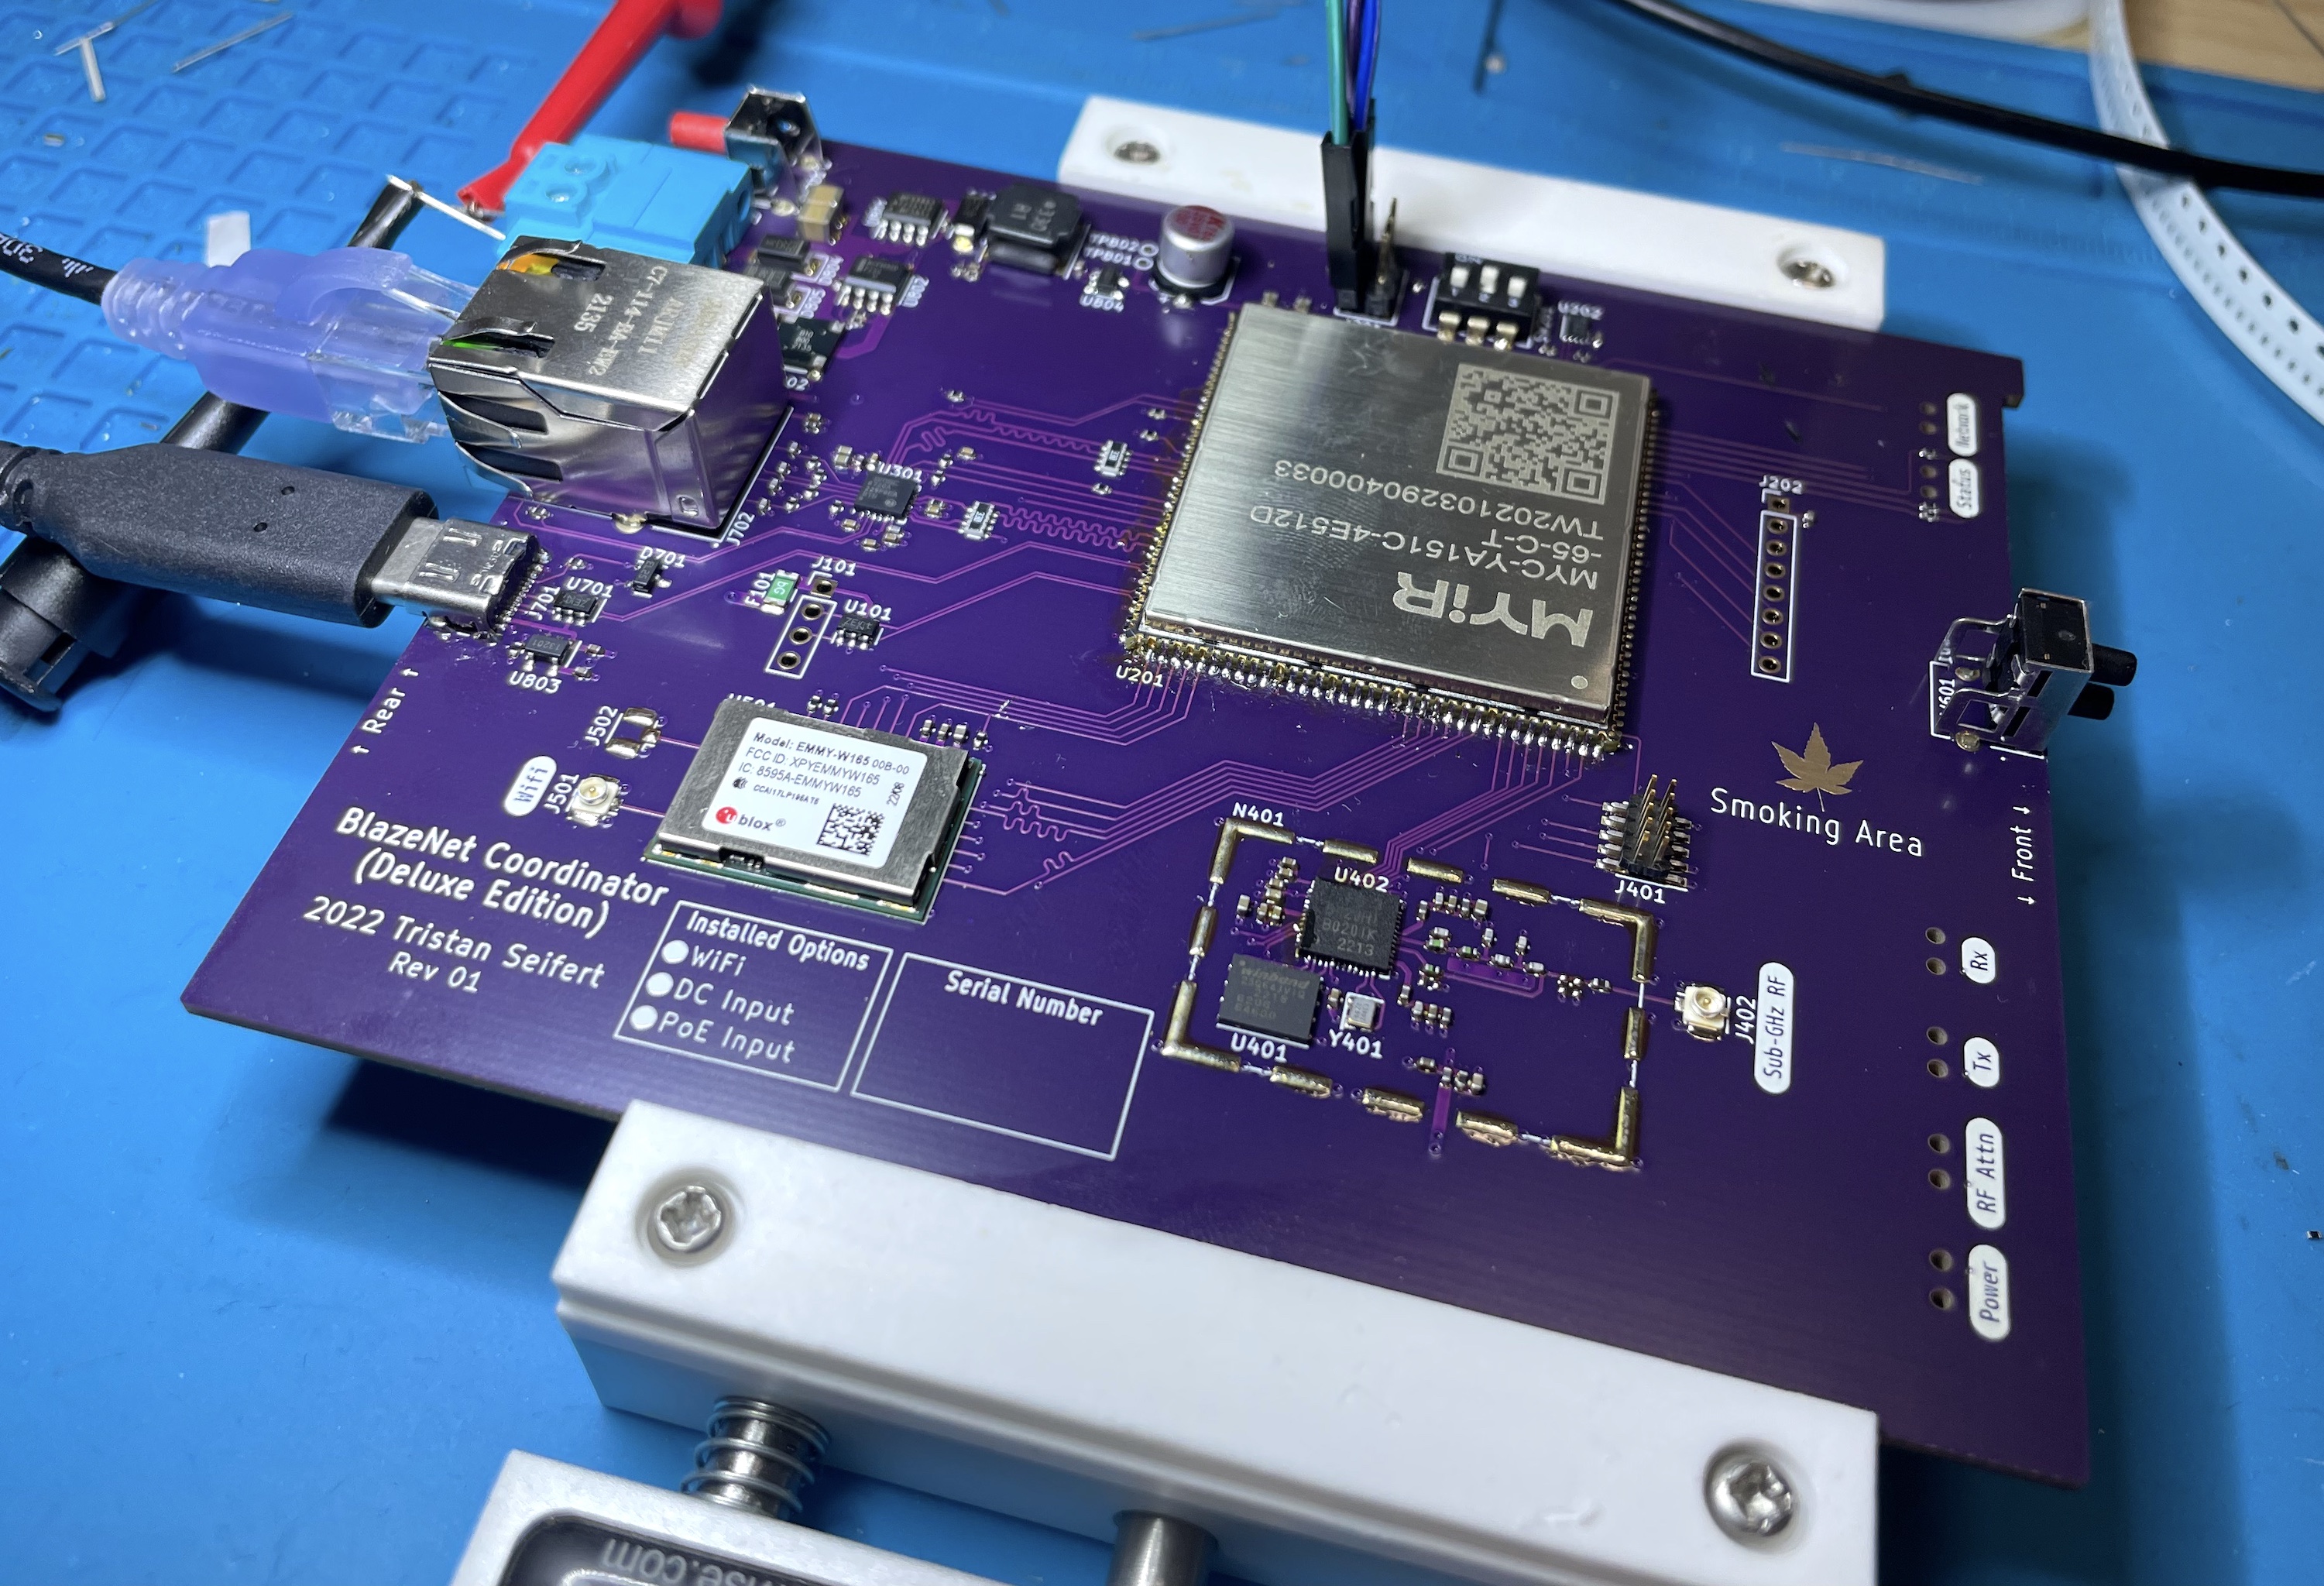 Can you spot all the areas I had to rework because they didn’t reflow properly?